Monday 11 April 2016
Music Video Final
This is the finished version of my music video. I am really happy with it as it now has more narrative into it and it would be understood by the target demographic.
Sunday 10 April 2016
Friday 8 April 2016
Making sure everything is in sink:

To make sure that the clips are in sink to the music I have to get them in the right position by moving them left or right by 1 or 2 seconds to get it perfectly right so the music video looks real and not fake. I found it quite easy to lip sink the singing but then it was very hard for me to sink the drums and guitars so I had to get help from some of my friends who are good in music.
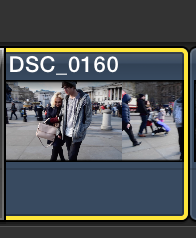
Making sure I have enough footage and adding more angles to add variety of shots

When editing I wanted to make sure I have variety of angles and shots of the band and the performance within the narrative. I think this helps the targeted audience stay interested because they get the feeling that they're in the room with the band. I took some screenshots as example to show that which are underneath.


Editing in the Band Performance

When I was editing in the band performance it mostly went in at the end of the song there were bits before that but not many. However this was the build up of the song so I decided that I need more footage there. To make it synchronise with the music I had a lot of short clips of the band and narrative to make it more interesting and go well with the speed of the music.
The Flashbacks


To recreate 'flashbacks' I used two white 'gaps' which were on the screen for a very short amount of time before and after the clip so when the music video is actually playing we get the feeling as if something actually flashes.
Black and White Narrative

I decided that I am going to make all the narrative clips monochromatic because they're meant to be like flashbacks so that would give it more like a memory effect. To do this I just lowered down the saturation which removes the colour of the certain clip. Yet, again I did this to all the other similar clips that were part of the narrative.
Colour Correcting certain shots


This is how I colour Corrected some of the footage I used so it matches the theme of the music video and it is consistent through out. I added a colour board to the clip and then on the colour board I played around with the colours bringing a little bit of the blue up and separating the rest of the colours so it is a bit more even toned. This seemed to work for me so I just copied that effect and pasted it to the other similar clips.
Fast forwarding certain parts
 I fast forwarded some of the clips to match the atmosphere and the tone and speed of the music. This is how I did that. I chose a clip and clicked on it.Then I had a couple of options. I clicked on the menu and then clicked on "fast"

After this there are four options. You can either speed it up 2x, 4x, 8x or 20x- you could also pick a random number yourself but I need 2x so thats what I clicked.

This is a larger screenshot showing what the menu looks like.

 After I had done it to one clip I wanted to just paste it to the other ones so it saved me time. To do this I clicked on the one I have already done and using the keyboard pressed "cmd + C " which copies the clip and effect because I don't want to paste the clip , I want only the effect I then click on the next clip and press " cmd+alt+V" this pastes only the effects what ever has been visually done to the clip you've copied.
Editing more footage into the music video
After I had more footage I started replacing the place holders with some actual clips of the video. Yet again, I didn't have enough footage so I had to film again to make sure I have a variety of angles. Also at this point I am filming with the second actor who is going to be lead singer because it didn't work out with the first one as he wouldn't mime the words as he is very shy and this made the video look very fake after i started editing it so I had to re-film with another actor.
Wednesday 6 April 2016
Final Poster

This is my final version of the poster. It includes the new band that I have used for my music video.
FINAL Digipak
Digipak:

This is the final digipak I have created for my band. I have added a special feature which is that every copy the audience buy includes a real polaroid photo of the band.

This is the final digipak I have created for my band. I have added a special feature which is that every copy the audience buy includes a real polaroid photo of the band.
Filming Band Performance
Today was the first day I filmed a band performance. I arranged everything and told the members of the band to meet me in a drama room after school. I had a study period last so I had time to arrange a stage and set up lights and all the music instruments that I need in the correct place. Just before the band arrived I did some test shots using the cameras to check if the lighting looks good on the camera and it did on one of the cameras which was my own personal DSLR camera ( Nikon D3300 ) and the other two cameras were the ones I borrowed from school and they were Canon D1200. I didn't like the quality of the Canon cameras so I decided to use just my one but just shoot everything a lot of times so I have a lot of different angles.
After I went home and watched the footage I realised that I don't have enough footage because most of the footage is the whole band and there were not many variety of angles. Also the lead singer was covering the drummer almost the whole time.
I wanted it to be perfect so I scheduled another date with the band to re-shoot.
Planning a Photoshoot for Digipak and Poster
I am planning to go out with the whole band to several locations on 26th March and take a variety of photographs for the digipak and poster. We are going to go to a car park in a shopping centre because there I will be able to take some photographs of the band looking down into the town. However, on the day of the shoot we wasn't allowed to go out there due to health and safety reasons so we found some other suitable locations such as a skate park and other similar places.
Production log
January 13th 2016
Filming Performance- Just Michael
18th and 19th February 2016
Filming Narrative and other shots in London with Michael and Jasmine
10th March 2016
Filming Band Performance 1st time
18th March 2016
Filming Band Performance 2nd time
21st March 2016
Filming more narrative shots with Michael and Jasmine
26th March 2016
Photoshoot for Digipak
Music Video Feedback
After showing my first draft to my class I got some feedback from all my class mates and teachers. Also I posted the video on Youtube.com and asked some of my friends on social media to watch it and give me some feedback too.


So these are some of the things people pointed out:
- the narrative is unclear
- not enough variety of shots
- the performance needs to be serrated with narrative footage
- theres a guy (not an actor) on the tube who looks straight into the camera and laughs.


Best Photos of Latest Photoshoot


These are some of the photos from the last photoshoot I done for my new digipak and poster due to the change of band/ actors. These photos are some of the most successful ones in my opinion. This is because they suit the genre of the song/ band very well. They all look a little bit different in terms of style. This is because of their music instrument role.
First Draft
This is the first draft for my music video. I rally like the visuals and the way I have shot it as it is as I planned it. However, some of the negatives are that the narrative is not clear. I am going to film again so I can add more narrative into the video and also I will re-arange it so it is very clear to my targeted audience. Overall I think it is okay but there is still stuff I can improve on.
Fonts for Digipak and Poster
These are some of the fonts I have downloaded and going to experiment to see which one suits the genre best and if it goes well with the photographs. My two favourites are the ones on the left hand side " Indie Summer" and "Indie Queen". I like them because they're very simple and would go well with the imagery I have because it is quite complex.


Subscribe to:
Posts (Atom)